Hacking The Wetware 3: Veritas Liberabit Vos

Introduction

We all lie to ourselves all the time. It's a part of the human condition.

But some lies are more harmful than others, and if you're not straight with yourself about where your actual skill set is at, it can easily become an obstacle to personal and career growth that will prey on your mind and create stress on your life that you could avoid if you arm yourself with the right tools and have the courage to see things as they truly are.

Veritas Liberabit Vos: Or in English, the truth will set you free.

Of Boiled Frogs and Thoughtless Choices

Moving through a career in technology can feel a lot like skiing downhill while juggling, where at any given moment any number of the objects you're juggling can be on fire.

So it's very easy to find yourself moving in a direction you might think is wrong when you get a moment to breathe.

For the first 20 years of my career I got along just fine with my limited coding skills. I could whip out a shell script or some simple process oriented code in no time flat, and by and large that's all I needed to do when I worked as a systems administrator or even release engineer.

But over the last 10 years, as I transitioned into a devops/platform engineering role, those skills just didn't cut it.

But that's not what I told myself.

It's not like I actually thought "Oh hey I don't need to learn anything new, I'm GREAT!", it's more like I just focused my work on the blazing forest fire that was right in front of me, or even choose to pick up a shovel and muck out the stables instead of noticing that my co-workers were taking more risks by taking on more challenging and complex tasks.

It's more like I convinced myself that if I could be seen to be working really hard nobody would notice that there was this giant gaping hole in my skill set.

Understanding how you ended up where you are right now is important as it can help you understand the ways in which you'll need to change in thought, action and behavior in order to get where you know you really need to be.

Science!!!

One of the most difficult aspects of any situation like this is cutting through all the feelings involved and trying to come to a fact based understanding of the realities of the situation.

This is really really hard! We're talking about effectively teasing out a core part of your being, your abilities and talents, and putting them under a microscope. Measuring them with calipers and a ruler and ideally even attaching quantifiable values to them.

But there are tools that can help. In my case where I was trying to grow a set of software development skills, I found platforms like Pybites and Exercism to be tremendously helpful. The key is a very clear demarcation between success and failure. Without that doing any kind of assessment becomes much tougher due to subjectivity.

Obviously I gave these specific examples for my particular case, you have to figure out what deficit you're trying to address and come up with your own.

You Need a Concrete Plan

OK, so now you've admitted to yourself that things aren't where they need to be. Great! That's the first step, now what are you going to do about it?

Come up with a quantifiable, reasonable goal, and set yourself a reasonable due date for completion.

This is a moment where our ambition can work against us. If you say "OK I want to be able to successfully and correctly code 1 exercise a day and attain X rank within the next two months".

How realistic is that, really? Are you working full time? Do you have other stressors or drains on your time that you simply cannot change? These kinds of obstacles are there for everyone. The trick is how we choose to handle them.

Optimize For Success

Be realistic with yourself. Plan for success and give yourself the space you need to succeed! We've all found ourselves wallowing in that feeling of extreme disappointment because some lofty goal we set for ourselves didn't happen.

Make your goals small and attainable, because optimizing for success builds the self confidence we need to power through the challenges that come our way in the future!

Optimize For Success Part 2: Deliberate Practice and Resources

In the book Peak: Secrets From The New Science of Expertise the authors describe the concept of "deliberate practice".

The idea is that unguided practice alone can be a very inefficient way to learn. Having a coach, teacher or even a competent study buddy can accelerate your velocity and improve your chance of success enormously.

I found one example they gave to explain this rather apt: A person looking to perfect their gold swing could practice at a driving range hundreds of thousands of times, repeating the exact same bad form and crappy results every single time.

If your situation isn't like mine, and there aren't platforms designed for your specific need, what about your community? Could you get coaching from a mentor? People are often surprisingly willing to help someone out towards improving their career.

Local meet-ups can be good for this, giving you an opportunity to network and chat with other like minded folks who can help you on your way.

Finding a more supportive work environment might be an option for you as well. I know that in my situation I moved from a fairly high octane megacorp job to working at MIT and that was one of the best career decisions I've ever made.

People in this environment have time to support me. For years everyone assumed that because I have 30 years in that I had outstanding software development chops. And like I admitted above, that just wasn't the case.

At MIT, my manager and co-workers actually have the time to walk me through things, occasionally even explaining like I'm 5 and going very slowly, but it turns out that's something I needed all along but never got, in part because I was so busy telling myself everything was fine that I never really asked for it in any kind of sincere, assertive way.

Self Confidence Through Right Action

Whatever your plan of action is, and whatever your outcomes may be, you should give yourself credit for the steps you're taking to get your career on track.

If you're putting the work in, and moving the needle, even if it's moving more slowly than you'd like, please for goodness sake try to feel really good about that because you are doing way more than a huge swath of the population that just stays locked hopelessly in place, waiting for some magical rescuer to come take them away to a better place.

I hope this helps someone break out of the paralysis and self doubt that can come from this problem. Good luck!

Git Submodules are awful but occasionally necessary.

Yo Dawg I Hear You Like Dotfiles In Your Dotfiles

Intro

One of the beautiful things about powerful tools is that they enable you to do easy things easily but also more complicated things as well.

Git is the perfect example of this. It represents an incredible amount of innovation in mainstream widely adopted version control systems, but it has some of the worst UX of any software I've ever used, and that includes Nortel switch administration consoles where all input was in the form of numeric codes :)

Git Submodules

Git submodules are a fractal of bad UX, which is almost assuredly why they generate such incredibly strong feelings among the Git using community. Mention that you use submodules in various technical communities chat rooms and you might as well have lobbed a hand grenade into their midst without having had the decency to shout "FIRE IN THE HOLE!" first.

However, I encountered a very particular use case that to mind virtually necessitated their use. I would welcome any alternatives people may come up with other than "Don't do that".

Let me explain.

The Plot Thickens

I manage my dot files using Github, and in particular I utilize a variation on the method laid out here.

You can read the article for details, but the upshot is that my home directory actually contains a Git repository that houses my dot files, so I can revise them to my heart's content and enjoy all the benefits that managing source code in Github brings to the table.

Now, here's where the need for submodules comes in.

I co-maintain a moderately popular Neovim project called kickstart.nvim. As such I need to be able to check out the latest revisions and test them on my own system to see how they integrate with my own customizations.

Given that, being able to simply git pull the latest is critical.

So we have a "Yo dawg, I hear you like dotfiles in your dotfiles!" situation here. Git submodules to the rescue!

I won't go into the details around adding a submodule to your existing project, that's covered elsewhere in way more detail than I have time for here, but you can see the net result in the repo I linked above.

I have kickstart.nvim checked out as a submodule of my main git dotfiles project, so I can always pull down the latest changes from the master repository into my own personalized fork for testing.

Traps for the Unwary

As I mention above, Git submodules represent a loaded footgun and they are extremely easy to mis-use to the point where you wind up with a tangle of wires shooting sparks in your git workspace trapped in an unendingly frustrating purgatory of bad error messages, unclear working states and an utterly obtuse route back to the "happy path".

How do I avoid this? I Keep It Simple, Stupid :)

Simple Rules For My Simple Mind - Using Submodules Sanely

I follow a few simple rules that keep things understandable. The key is not trying to do too much.

Avoid them wherever possible

Seriously, unless you have a use case like mine, they are a faff. You're better off avoiding them if you can, but if you can't or can't see a way to avoid them, then read on!

Treat your checked out submodules as read-only.

Make any changes in a separate workspace for that project where you can branch, fork and modify to your heart's content.

It's really tempting to just ignore this rule and make changes in your submodule. I can just HEAR you saying "But Chris, it's git. It SHOULD work!" and the truth is - in a perfect world, it does!. But you and I both know the world we live in is far from perfect, and if humans can be counted on for anything it's an utter lack of consistency and discipline when the chips are down and time is of the essence.

So save yourself the heartache, make your changes elsewhere, and then simply run:

git submodule update --remote potentially adding --force if things don't seem to be updating properly.

Don't be afraid to nuke and pave!

Assuming you're following my rule above, you can always simply nuke your submodule and start over. Remember if you go this route that you'll likely need to delete the .gitmodules directory in your project as they contain important state for your submodules.

Seriously, this can be a huge win when you find yourself thinking "OK what the blue blazes is going on?" and chances are good that if you choose to use submodules, this day will come!

Unless you know better...

As I've mentioned several times, submodules are indeed a pain, but for my needs as outlined here I can't think of a better way to implement this. Do you know of one? Have you found a minimal faff way to implement this without manually copying new revisions from one Github project into another?

If you do, I'm all ears! You can reach me on the Fediverse - @feoh@oldbytes.space or via email - feoh at feoh dot org. Or leave a comment here if that works for you. In any case I look forward to hearing from you, even if you think I'm full of malarkey :)

Update: Someone knew better! Git subtree!

If you're a technical person in 2024 and you're not on the Fediverse, you're missing out. It doesn't have the dank memes and crap posting Twitter does, but some of us consider that a feature :)

When I wrote this post, I sent a copy there and asked "Does anyone know better?". Thankfully I received an incredibly helpful response.

It turns out there's a much better alternative to git submodules, and they're called Git subtrees. They're awesome :)

You can find all about them here. Once you set a subtree up, it checks out automatically with the rest of your repository.

I'm delighted thus far!

Why do YOU Homelab?

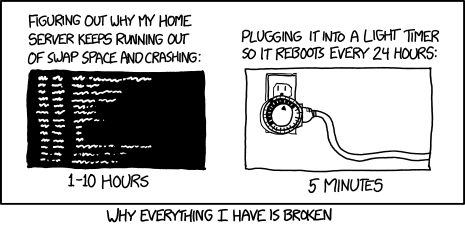
XKCD Comic About Self Hosting

The Internet is a Dangerous Place These Days (Introduction)

In this day and age, you really are taking a risk if you're not running some form of ad blocking. Heck, even CISA is telling government agencies this.

So I mentioned on the Fediverse that I was thinking about going back to using Pi-hole for this. It's quick to set up, super convenient, and all around does the job well.

At this, -dsr-, a long time online acquaintance whose opinions I respect, piped in with this:

Generally, when he speaks, I listen. His skill as a system administrator is formidable and to say that he has helped me out from time to time would be an understatement.

So I started down the rabbit hole of doing what he suggested and installing BIND in a VM and getting it set to use DNSRBL to perform the same kind of ad blocking Pi-hole does.

And then I realized something: This is absolutely positively the wrong tool for my use case.

Why? I'll answer that, but before I do, let's get down to the business of this post.

Why I Homelab

Over the last few years, people interested in technology have enjoyed an incredibly bounty of free and open source software. It's not just possible but easy to do things that would in past eras have taken incredible amounts of effort and physical hardware with a few hours of spare time, a relatively small amount of money, and maybe a smidgen of space on a desk somewhere.

There are all kinds of reasons one might wish to run various bits and bobs of infrastructure at home, and sometimes trying to figure out which rabbit hole to go down can be dizzying and maybe even a bit intimidating, and answering the Why question may be able to help you as it did me.

I run a bunch of my infrastructure at home myself rather than relying on cloud vendors because ultimately I want to enhance my privacy and, more importantly to me, take control of my technology life in a day and age when books can vanish from your Kindle in the dead of night, never to return, music you love can sink beneath the waves when your streaming service and a record company get into a tiff, and software you purchased with actual money can evaporate into a puff of bits because some company somewhere decided it wasn't profitable enough.

I'm not primarily doing it as a way to build skills for my career. I do feel like any time I flex my technical muscle I'm improving myself career wise though.

Why Others Might Homelab

There are all kinds of great reasons to run your own server hardware and software at home that don't match those I cited above. I want to cover a couple of them here.

Building Your Systems / Network Administration Skills

Depending on what you do for work, it can be incredibly hard to constantly evolve all the skills the job market is looking for in new hires. Whether you're currently working or looking for work, being able to honestly claim "Oh yeah, I've done that. I set it up in my Homelab" is a fabulous answer to have during an interview, and you can certainly add these new found skills to your resume so long as you're VERY honest with yourself about your actual level of mastery. Don't fall prey to the Dunning Kreuger Effect!

For example during my last job search I was finding employers REALLY wanted Kubernetes experience, so I set up Rancher in some VMs running on one of the ProxMox servers I have here. It was great and I learned a tun.

This is where -dsr-'s toot above really comes in. He's absolutely right, setting up BIND instead of a Pi-hole is most decidedly not hard for anyone with a reasonable degree of comfort with UNIX systems and infrastructure, and you win familiarity with one of the most important pieces of infrastructure software in the world - bind.

The Chance To Experiment With Zero Consequences

I don't know about you, but after 30 years working in the technology sector, I've lost count of the number of times I was asked to build some really truly complex piece of software or infrastructure, live, without a net. No test environments, no dry runs.

You'd better be good at running downhill while juggling chainsaws, because that's what you'll be asked to do. Over and over and OVER.

With a homelab, you can play, blow stuff up, shrug your shoulders and enjoy the satisfaction of knowing that you learned something from your failure and will know what to do next time.

This is what life as a technology professional should be like everywhere, but all too frequently isn't.

Why I Ultimately Chose Pi-hole

The answer is very simple: My lovely wife :)

In order to be an effective solution for us, she needs to be able to control the ad blocker we use.

The most critical thing is that she herself be able to add exceptions to the block list. With Pi-hole, that's as easy as surfing to the web address of Pi-hole's admin and entering a value.

There is absolutely positively zero chance of her learning a UNIX editor, much less BIND's configuration file format.

It's not that she couldn't do it if she wanted to, but she REALLY doesn't want to! Computers are appliances to her.

So, for my purposes, any desire to hone my sysadmin skills is irrelevant, at least for the purposes of this particular decision.

So, why do you homelab?

A Mac User's Survival Guide For Buying A PC Laptop

"Scream" by xuhulk is licensed under CC BY-SA 2.0.

Why Are We Here?

Mac users tend to be a rather opinionated lot. We generally love our Macs for all kinds of reasons - the interface, the hardware, the polish - the list goes on.

But life is complicated, and there are all kinds of situations that might make a dyed in the wool Mac user choose to buy a PC laptop.

For myself, the motivation was simple. Apple had about a 5 year stretch where they manufactured nothing but epic turds for laptops. I don't choose such a vulgar turn of phrase lightly. As someone who has literally been a Mac fan for decades (My first Mac was a Motorola 68XXX CPU based Quadra tower. Yes I'm old) I was appalled at how far the quality had fallen. I won't go into it here as that's not the point of the article, but let me just offer this one hint: Butterfly keyboards.

So anyway, the pandemic was just starting to kick up and I realized that I REALLY needed a personal laptop. So here we are.

This isn't going to be exhaustive, I'm just going to cover some of the more salient points you may not have been aware of, having lived the sheltered Mac life as I did :)

Also note these are my opinions. I'm not by any means an expert, I just wanted to share what I learned in hopes it might help someone.

Choosing a Vendor

Which laptop maker you choose will depend largely on what's most important to you. If ultra expandability is your think, you should probably check out Framework. If you care less about portability and want a luggable gaming rig, I'd give Alienware a look.

As for myself, I need something that would be sincerely portable, and I absolutely require a really good keyboard, as well as good warranty support because fixing it myself wasn't a thing, so I chose Lenovo.

There are plenty of other choices, but hopefully this will at least get you going.

Screen

One of the biggest nasty surprises I was in store for in my PC laptop buying experience was the screen. Mac laptops have, near as I can tell, always shipped with gorgeous, bright, high resolution screens.

This isn't always the case in the PC world, so if you're like me and picky about screens (in my case, I'm low vision, I NEED a large bright display), you need to be careful here.

To Matte or Not To Matte

Every time I mention nit count and screens, people who likely know more than I do about this stuff remind me that having a Matte screen can make a significant impact on the amount of perceived glare. That makes sense to me, but I have yet to have the opportunity to test matte and non matte screens side by side so I have no personal opinion on this. If I ever buy a PC laptop again though, I'll be sure to look for a matte screen. With glare being such a serious problem for me, it certainly can't hurt!

It's All About The Nits

The Lenovo T15 gen2 I bought is a lovely laptop in many ways, but the screen is totally unsuitable for me. At 15" and 300 nits, the display always leaves my eyes straining and can't handle use in outdoor daylight situations at all.

This is a deal breaker for me, so if it is for you, be sure to pay attention to how many nits your display has and whether or not it's big enough for your needs.

There are PC laptop models out there that match the 1000 nit gorgeousness of a Mac laptop's screen, you just need to be sure the one you pick is one of those models :)

Keyboard

As consumer demand has driven vendors to make laptops thinner, their keyboards have, in my opinion, suffered. Thankfully Lenovo realized that not everyone is willing to live with a mushy keyboard with no key travel, so their Thinkpad line all have keyboards ranging from good to excellent. The keyboard on my T15 was quite good with nice key travel and just enough tactile feedback to let my wrist know it can stop pressing. I tend to unfortunately CAVEMAN SMASH mushy keyboards, and then it hurts :)

Alienware laptops also generally have superlative keyboards, but as I said those are often more luggables than truly portable, so, it's all about the trade-offs :)

Unfortunately, it's very hard to shop for a keyboard that fits you through the mail. You may need to phone a friend or find a local computer store where you can actually lay hands on that model laptop to try it out yourself.

Ports

Be sure you get any adapters you'll need. PCs are more likely to have DisplayPort ports for monitor / video connections than HDMI, so you may need to go buy an adapter for your monitor.

You'll also likely see an actual wired network (Ethernet) port, because unlike Apple, PC vendors recognize that in many places wifi is dodgy as heck and having a wired network connection can be a godsend.

Warranty

If you're like me, when you buy Apple hardware, you ALWAYS buy Applecare to go with it.

Be careful about your laptop of choice's warranty options. One thing I really like about Lenovo in this regard is that they have good warranty service and the warranty attaches to the machine, not the person, so if you want to sell your laptop, the warranty travels right along with it.

I've seen several laptop vendors offer a 1 year parts and labor warranty by default, and that's it. I generally like to be sure I can get more out of my investment than that, but opinions vary on whether or not warranty service is a good idea. Just bear in mind that if you don't have one and you break it, you'll need to either fix it yourself or hope for the best at a local computer repair shop.

Closing

Now that Apple has gone back to making excellent laptops, I don't see myself buying a PC for myself in the near future, but having done it once, if I ever do again at least I'll know what to look for. I hope this helps you make a purchase you're happy with.

Whatever you choose, have fun and happy computing!

Windows Papercuts for *NIX Developers

Introduction

If you're used to developing on *NIX systems, coming to Windows can be a bit of a shock.

My goal in writing this article is to point out some of the pain points and, where I know they exist, some work-arounds.

Note that I'm talking about native Windows here. If WSL meets your needs and your environment allows it (not everyone's does. Many IT orgs turn it off) then bully for you but this article isn't about that :) I think WSL is both an incredible tool for developers and an awesome feat of engineering. I wish more Linux folks appreciated this. Anyway :)

So let's get started!

The Paper Cuts

The C Compiler

For most of us, having a standard raft of development tools on hand is par for the course. We just expect gcc and make to be there at our beck and call, and the fact that they're not can cause some tools to fail spectacularly.

For instance, whenever I start my editor of choice (Neovim) I'm greeted with:

Neovim C Compiler Error on Windows

Having spoken to some experts, apparently it's considered really bad form to leave your C compiler on the PATH on Windows. I suspect this is because malware on Windows is such an incredibly pervasive problem.

I get that, but then we should probably either modify our tool-chains to not expect that as a default or maybe create documentation to help people understand the happy path.

As near as I can tell, the 'standard' set of c/c++ tools on Windows is Microsoft Visual Studio. The free "Community" version works just fine though the installer is a bit of a jank-fest.

That thing provides a prompt shortcut called "Powershell for VS XXXX" and you can use that to get a shell that has the usual build tools available.

Not a great solution though, since the experts say not to run that way as a default, but having your editor blow up on start just-up isn't a great feel.

The Shell

While you certainly can run tools like bash or zsh on Windows, unless you really know what you're doing, this is not the happy path. You're in Rome. Do what the Romans do and you won't regret it :)

The good news here is that the native tools are now really quite good. Gone are the days when CMD.EXE was your only choice. You now have Powershell and it's really quite awesome.

Here are a couple of tips to make your Powershell experience awesome and help you appreciate what this environment has to offer.

Oh My Posh

This one's gotten a lot of press and let me tell you it's incredibly well deserved. It's like the oh my zsh of Windows shell prompts :)

Mine shows me git status and whether my last command's exit code indicates success or failure, as well as what Git branch I'm on. Here's what it looks like:

What My Oh My Posh Prompt Looks Like

I wrote some about Oh My Posh in my previous article on Windows for Python Developers.

PSFzf

One of the biggest productivity boost for me in recent memory was when I integrated fzf the fuzzy finder into my workflow.

With a single keystroke I can find any file or directory on my system. Navigation becomes effortless and the endless sequence of cd and pwd commands melt away in a burst of productivity goodness :)

Thankfully, Powershell offers all these benefits as well via PSFzf.

Here's what it looks like. In this case I wanted to edit my Neovim main configuration file init.lua:

Edit my init.lua file

The Console / Terminal

For long time *NIX users, one of the biggest bones of contention for a long time was the Windows console. To put it kindly, it was god awful, mostly because it maintained compatibility with the Antideluvian DOS console.

Happily, we now have a fairly decent solution Windows Terminal. I say fairly decent because it's still not quite up to par with your favorite NIX terminal, but the fine folks behind this open source project are working really* hard to change that, and the progress they've made here has been nothing short of miraculous. Mad props to these folks for fixing by far the biggest deal breaker for many around working in Windows!

They've even recently added an easier UI for editing settings, but you can also still go edit the JSON yourself if that's your jam :)

It's not perfect, but this is an incredibly flexible tool with a ton of depth and it's been exciting to watch it evolve.

The Windows Desktop/GUI

I'm sure there will be folks who aren't happy with this one but my take? Just ignore it.

Windows is pretty good about making EVERYTHING accessible from the keyboard, and many things are also accessible from the command line. If you just avoid graphical interfaces wherever possible, and if you're anything like me, you'll see your productivity levels soar and your frustration levels plummet.

Packaging

One of the big pain points coming from *NIX is the lack of a 'real' package manager.

I use the winget tool that comes bundled with Windows 11. It's officially supported by Microsoft and lets me install most if not all of the commercial apps I use.

It has the further advantage that it will write a JSON blob with all the packages you have installed, so you can get your software up to snuff with a single Powershell invocation.

But there are other popular options as well, namely Scoop and Chocolatey.

To be honest I wish MSFT had worked a bit harder to maintain compatibility with these other projects so we don't have multiple separate package namespaces. Can't have everything I guess.

Where Do I Put?

One of the things I continue to struggle with is the simple expedient of "Where do I PUT things?". On UNIX based systems, pretty much everything user or configuration related lives in $HOME. Not so on Windows.

As just an example, my Neovim configuration lives in something like $HOME\AppData\Local\nvim.

In some respects, I get it. Keeping application configuration separate is a good thing, but navigating where to put what can feel like a bit of a morass for the uninitiated.

Maybe once I get a better understanding of the lay of the land, I can create a cheat sheet for UNIX users.

Fin

That's all I have for now, but I may update this post as time permits or if various situations I detail here improve. Thanks for reading!

Hacking the Wetware 2 - Antipatterns (Burn Out & The Ego Trap)

"Boiling Frog" by DonkeyHotey is licensed under CC BY-SA 2.0.

Of Burn Out And Boiled Frogs

I can't speak for everyone, but as for my own experience, burn out can be tough to self diagnose because it happens slowly, by degrees.

It's a state of mind where pushing yourself even a little bit, even to do the things you'd normally do as a matter of course, feels incredibly difficult. It's that feeling of knowing you need to do something but being unable to actually complete the thoughts or actions necessary to actually get it done.

Often, at least for me, it's a result of having to perform the same set of tasks over and over again in a stressful situation.

Human brains simply weren't designed to be subjected to a constant diet of stress combined with cognitively challenging tasks and an overall lack of novelty or variation.

Understanding this can go a long way for preventing it, but even so, especially in the technology industry, it can happen to anyone.

Changing things up with your work load can sometimes help, but other times the source of the stress or conditions around your work mean that even varying your worrk may not be enough.

There's a really superlative book on this topic I can strongly recommend - Why Zebras Don't Get Ulcers.

How Does One Un-Boil a Frog?

There are a few things I have found to be helpful through the years in recovering from burn out.

Do Something Fun & DIFFERENT. Pick Up a New Hobby!

As a part of recovering from my most recent bout of burn out I've started learning how to play the piano/keyboard. A key aspect in this being effective is that it's something VERY different from the activity that got you here. For me, learning an entirely new skill that has nothing to do with computers has been satisfying and fulfilling.

Tech projects can be good too provided they're well and truly disconnected from the work that's burning you out and don't end up being a source of stress themselves!

Why not go for some long walks/hikes in the woods? Go for a nice bicycle ride? Finding fun activities that are also exercise can be good on many levels!

Give Yourself a Break

As professionals we put a ton of pressure on ourselves. Everybody wants to be a superstar and nobody likes to think about losing, even when losing a tiny and actually almost meaningless skirmish can feel like you've lost the war.

It can be difficult to zoom out and gain that perspective in the moment, but it's important to try and figure it out. Having solid support systems can be very helpful here, whether it's your spouse, a good friend, or even a therapist. Speaking of...

Get Help If You Need It

Many of us were raised to think of therapy as a thing for "crazy people" - that nebulous other that SURELY isn't us! We're stronger than that and more self sufficient.

Except, when push comes to shove, we're all human. We all need mechanisms in our lives to help provide balance and an outside perspective to keep us grounded and help avoid boiled frog syndrome.

I myself use BetterHelp and have found it incredibly useful.

Gratitude

This may sound a bit wu or perhaps irrelevant to some, but I have recently found it to be a powerful tool for shaping the way I think about things in a positive direction.

Taking a moment to zoom out from whatever I'm thinking or feeling and appreciate the fact that I live a life of such incredible privilege helps me gain some much needed perspective.

Clearly I'm not the only one, I found this Youtube video on the topic really helpful.

The Ego Trap

There's something else I want to talk about. This may not apply to you, but if it does, maybe I can help.

Many of us who work in technology take a lot of pride in our work. We may even, if we're lucky enough to go to work for what some might consider an 'elite' company, attain positions with a fair bit of cachet in the industry.

This can create yet another variety of boiled frog - the ego trap. Where your very identity becomes bound up in your job. It's not just "I work for BigCo" - it's "I AM BigCo".

I can't imagine that anyone who's fallen for this would even admit to it in the moment. It's the kind of clarity many of us only get when our situation changes out from under us and we're forced to confront an unpleasant reality.

Remember, no matter how excited you are to be working for any particular company at a particular job, at the end of the day it's JUST a job.

Cliches about health being the only thing that matters aside, this situation can create some incredibly intense tunnel vision:

"I WILL find a way to maintain the status quo!".

Thing is, maybe you Can't and moreover maybe you shouldn't! For your own sake and perhaps for that of your employer.

Sometimes, the only winning move is embracing your limitations and accepting that you can only do so much so fast.

I don't mean to say that one should just meekly accept defeat, but sometimes winning is having the wisdom to tactically retreat and formulate a better plan for success :)

Skills can be built upon and improved, and taking ownership of that process and the will to make it happen can itself be incredibly empowering!

Mis-Adventures In GatsbyJS

Key West Octopus by oe Parks is licensed under CC BY-NC 2.0

Over the last few years I've been feeling like living exclusively in my Python programming happy place is something I can't afford to do.

Setting The Scene

It's almost impossible to ignore the rise of JavaScript in our industry. What started out as an extension project for Mozilla has grown into an ecosystem with more tentacles than an H.P. Lovecraft novel.

So while there are aspects of the language that I find very uncomfortable to work with and that seem to be a bad fit for my brain, I feel compelled to give JavaScript a fair shake and make a point of using it "in anger" in an actual project that I can ultimately get something out of beyond just learning and keep using and maintaining over time.

For the last few years I've been running my blog on Pelican a beautiful Python based static site generator which has one of the most elegant and easy to understand and modify code bases of any open source project I've ever used.

However, Pelican's minimalist DIY spirit was forcing me to come to terms with an ugly reality I was loathe to admit: I know absolutely nothing about modern web development!

Sure, I've been able to cobble together simple HTML pages for years. Nothing difficult or involved there, but there is a very long way between being able to add some HTML tags to a text file and producing a website that people will actually want to visit in 2022.

O.K. This smells like an opportunity to lean into the discomfort and grow some new skills so I can hang out a shingle worthy of my brand in full tilt 2022 adaptive web style.

Enter The Great Gatsby(JS)

On the face of it, there's a lot to like about GatsbyJS. Here are a few things I found particularly attractive going in:

  • Layout will adaptively resize itself depending on the format and characteristics of the viewer's browser
  • Sites written with GatsbyJS degrade gracefully and work fine even when people have JS turned off
  • Site components communicate using an GraphQL back-end

So, I dove in head first and started working through the tutorial which, helpfully enough, shows the developer how to build a rather nice, feature-ful blog complete with rich tags support and an elegant navigation system.

And I've gotta say, the tutorial was a really good experience! Want to build an index page? Great! Write some JSX that queries the GraphQL back-end using a fairly elegant syntax that embeds the query right into the page. The query returns your post list which your page then renders. Hey this is pretty cool!

Here's what that first page looks like so you can get the flavor:

import * as React from 'react'
import { Link, useStaticQuery, graphql } from 'gatsby'
import {
  container,
  heading,
  navLinks,
  navLinkItem,
  navLinkText
} from './layout.module.css'

const Layout = ({ pageTitle, children }) => {
  const data = useStaticQuery(graphql`
    query {
      site {
        siteMetadata {
          title
        }
      }
    }
  `)

  return (
    <div className={container}>
      <title>{pageTitle} | {data.site.siteMetadata.title}</title>
      <header>{data.site.siteMetadata.title}</header>
      <nav>
        <ul className={navLinks}>
          <li className={navLinkItem}>
            <Link to="/" className={navLinkText}>
              Home
            </Link>
          </li>
          <li className={navLinkItem}>
            <Link to="/about" className={navLinkText}>
              About
            </Link>
          </li>
        </ul>
      </nav>
      <main>
        <h1 className={heading}>{pageTitle}</h1>
        {children}
      </main>
    </div>
  )
}

export default Layout

A couple of weeks of evening spare time (probably a couple of days of wall-clock time - bear in mind I'm teaching myself JavaScript as I do this) - I finished the tutorial and deployed my new blog. I was elated! Mission accomplished!

The Plot Thickens

The next day, after I'd triumphantly posted the URL for my shiny new redone blog to social media, the first fly appeared in the GatsbyJS soup manifested.

A friend rather understandably said "Hey, I use an RSS reader to keep up with blogs. You used to have an RSS feed. What's the URL for the new site?"

Uh. Woops. Truth be told I hadn't even thought about that, and the tutorial doesn't mention it. That's pretty understandable too, right? You don't want to overwhelm people who are trying to adopt your technology with a firehose of details to master when they're just starting out.

OK. Let's bring up GatsbyJS's (up to this point) excellent documentation and see how we add an RSS feed...

The Abstractions Begin To Crumble

Right then. I find a page describing how to add an RSS feed to your blog, Just add this handy dandy plugin to your site. This will let you do a similar GraphQL query to the one you used for your post list, only this time you'll be generating your RSS feed. Here we go!

Add the plugin and BOOM! My site build fails with an utterly inscrutable Webpack error. Why? Ah the plugin was for a prior version of GatsbyJS and isn't compatible with the one you used to build your site. OK, let's just use that older version of GatsbyJS instead!

Well crud. Turns out that the tutorial was written using MDX, a JSX flavored version of the popular Markdown mark-up language for React JSX pages, and the plugin used to provide MDX support both doesn't work with the RSS feed plugin and doesn't run in the prior version of GatsbyJS.

I said I wanted to learn. Let's roll up our sleeves and see about porting that plugin to the new GatsbyJS version.

Three agonizing weeks of pointless struggle later...

The Knee Bone DOESN'T Connect To The Shin Bone

One of the things that drew me to GatsbyJS to begin with was this beautiful abstraction: pages, plugins, and components all seamlessly interpolating with a GraphQL back end.

And it does work that way to an extent. All the plugins do indeed communicate with the rest of your system using GraphQL queries, but because the plugin architecture doesn't seem to enforce any interoperability rules, and also because successive GatsbyJS versions introduce radical breaking changes to the plugin API, you end up with a programmer who was sold a glorious GraphQL future but winds up holding a rather large bucket of bolts that refuse to work together to build a meaningful whole.

To Be Fair

I realize I'm painting a rather unappealing picture of GatsbyJS here, so I just want to say that it became a rather popular JavaScript framework a year or so back with good reason. There are many many competent programmers out there deploying beautiful sites that scale using these tools.

I also recognize that building abstractions that don't leak and that seamlessly work well together is incredibly challenging. I just feel that ultimately GatsbyJS isn't the tool for me and also that perhaps sme of the marketing should be adjusted to reflect reality on the ground.

It also needs to be said that GatsbyJS is 100% FLOSS, and as such is a gift freely given by its implementors which I very much appreciate. None of what I write here changes that in any way.

I should also say that my inability to build with it is as much due to my own lack of JavaScript acumen as it is with the tool itself.

These are just my opinions and personal experiences and thus should be taken with a grain (or perhaps a shaker) of salt, especially if you're a seasoned JavaScript developer.

The Happy Ending (But Not With GatsbyJS!)

Ultimately, I decided that the best thing I could possibly do for myself with this blog project was to go with what I know, so I chose Nikola - a superlative Python powered static site generator, and I'm just delighted with that choice.

I'm still planning on finding something to use JavaScript for, it's just not going to be this particular task :)

A Teency Bit More Housekeeping

I'm switching the static site generator I ues for this blog from Pelican to Nikola.

There are a number of reasons for this - better/more theme options, a more active development community, and some really swank features I just love.

The up-shot however is that the RSS feeds will need to change. The new links are clearly signposted on the header at the top of the blog.

Also, I've switched the comment system from Disqus (Which I really Dis-like :) to Intense Debate which I've been using on my personal blog and love to bits.

You can find the old Disqus comments here

Thanks for understanding and updating your feed readers!

Some Brief But Important House Keeping

Hi all!

Just a brief house-keeping note.

This is going to hence-forth be strictly my professional blog.

I'll be cleaning out old posts that aren't tech related and maybe moving any I feel particularly inclined to keep over to my new personal blog, Playing With Quicksilver.

I'm not trying to hide anything, so feel free to browse my old posts via the Wayback Machine over here.

I look forward to blogging here more often! I'll likely also be switching to the Nikola static site generator because it offers a number of features and creature comforts that will make my life easier (Like having a command that will pre-seed a new post with all the right metadata fields. Yay :)

As always feel free to hit me up here or on social media if you have any thoughts.

Onward!

Getting Started With Python On Windows 2021 Edition: Push The Easy Button!

Don't Despair! This Is Gonna Be Easy! :)

Over the last few months I've seen a ton of confusion swirling around social media about how to help people who are new to Python development and software development in general get up and running on Windows quickly.

GOOD NEWS! You can ignore all that. Many of these suggestions are well meaning but come from people who don't actually do Python development on Windows regularly.

Note that I'm not going to tell you the 5 different ways to do a thing, I'm going to tell you the ONE easy way :)

So let's get started!

Side Note: Everyone Will Tell You To Use WSL - You Probably Don't Want That!

I hear a lot of incredibly talented and experienced well meaning UNIX/Mac enthusiasts tell newcomers looking to get going on Windows "Oh well you just use WSL! It's easy! Then you install python with apt get yada yada, and then you install pyenv, and then you configure your shell's environment to use the right shims... and..."

The truth is that if you want to learn Linux - you SHOULD! It's an incredible platform and a virtually bottomless font of power waiting for you to tap.

But if there's one thing I've learned in 30 years in the tech trenches, it's that trying to learn a million things all at once is the surest way to learn nothing. Why not focus on teaching yourself Python programming first and then exploring Linux as a separate effort?

Install Python

If you're on Windows 11 (And I recommend it if your hardware is new enough!) this is as simple as bringing up a Powershell in your swank Windows Terminal. If you want a look at my setup please go read my article on that.

Anyway, all you have to do is type:

winget install python

That's it! This will install the latest stable version of Python from The official Python website. If you're not lucky enough to be running Windows 11, just download the latest stable version from the website's Downloads page and double click on the executable file in your Downloads folder. If you're not sure just keep clicking Next on the dialogs and in a few minutes you'll have Python installed!

Embracing The Power of Py! (Psst. This Is The Easy Button!)

The 'py' Python launcher used to be a super power that only Windows versions of Python shipped with, but now thanks to Brett Cannon, an amazingly prolific Python core developer's hard work our UNIX friends can enjoy the easy button as well!

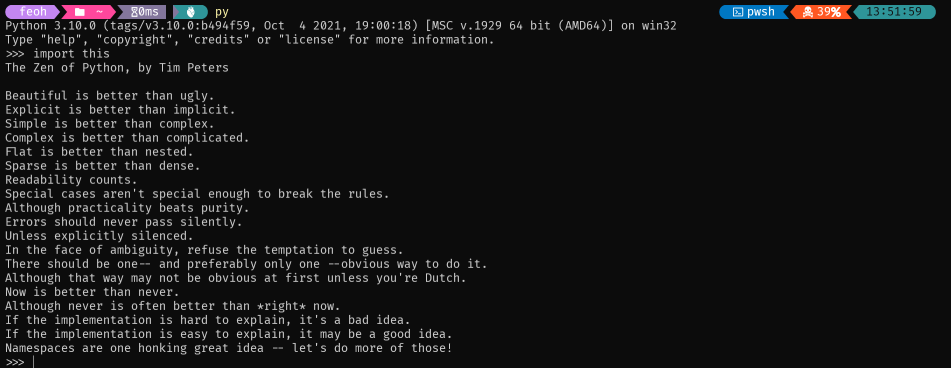
So let's get this party started and see how easy it is these days to get into the Python prompt:

Windows Python Prompt With Py

Pretty easy, right?

Note that py has other superpowers as well. It can list all the python versions you have installed, and also let you choose which version to run with the arguments you choose. Run:

py --help

to see an exhaustive description of all the magic tricks py can do :)

Set The Stage

Again, from your Powershell, create a project directory for yourself. Programmers often create a 'src' directory wherever it's convenient (Maybe in your home directory?) and then put their projects underneath.

So let's go ahead and do that:

CD $HOME
mkdir src\starwars_characters

# Yes i'm a big nerd. Our project will pull down a list of characters in the movies from the Star Wars API :)

cd src\starwars_characters

Building A Sandbox

Now let's create a safe space for our project so we don't unintentionally install libraries or other experiments in public. This can lead to situations where you go to create another project but a library you installed previously either causes undesirable behavior or perhaps is even in a broken state, getting in the way of you getting your work done.

We're going to create a thing called 'virtual environment'. Don't worry too much about the details, just think about this as a nice tidy sandbox for us to play in where we don't have to worry about breaking anything outside.

Again from our Powershell prompt:

# Actually create our virtual environment. Put the bits in a folder called 'venv'.
# Most Pythonistas use this folder name, but you can use any name you want :)
py -m venv venv

# Actually activate our new virtual environment in our Powershell
.\venv\Scripts\Activate.ps1

Let's see what happens when we do that (Assuming you're running Oh My Posh, and you should be if you followed my setup article):

Create/Activate Virtual Environment

See what happens there? We create the virtual environment, and our shell notices which Python version it uses, and tells us that in our Powershell prompt!

Then, we activate our virtual environment, and now our prompt adds a (venv) at the beginning. With this visual indicator in plce, we know we're safely ensconced in our sandbox and can start playing with no worries!

Install Necessary Libraries

You'll need an editor or an IDE. I use Visual Studio Code. It's free, it runs on any modern computer, and it offers an incredibly rich set of tools to help you with your development. Bonus points? It's also free, and even largely open source.

Let's get started, and tell Python which libraries we'll need for our project:

code requirements.txt

In this file, add a single line:

requests

If you want to add a truly superlative interactive Python environment with which to prototype and explore, you could also add IPython:

IPython

(Note IPython here is case sensitive so be careful!)

Now, still in our Powershell prompt, type this command to actually install these required libraries into our virtual environment:

py -m pip install -r requirements.txt

You should see some messages about libraries being installed. Note that you invoke IPython this exact same way:

py -m IPython

Write The Code

Create a file in your project directory called starwars_characters.py with your editor that includes the following code:

import requests

STARWARS_API_URL_BASE = "https://swapi.dev/api"
GET_CHARACTERS_URL = f"{STARWARS_API_URL_BASE}/people"

response = requests.get(GET_CHARACTERS_URL)

response_json = response.json()

characters = response_json['results']

for character in characters:
    print(f"Character Name: {character['name']}")

Here's what my Visual Studio Code session looks like with this code loaded and the output shown in the run window:

Starwars Project VSCode Screenshot

Notice that bit at the bottom that says 3.10? That shows us that Visual Studio Code automatically detected the Python we have installed in our virtualenv. You can click on that to see a list of installed Python interpreters to choose from.

We can run our new project either by using the Run menu inside Visual Studio Code or on the command line with that very same py syntax we used before:

py starwars_characters.py

The End Is Just The Beginning

Well there we have it! You have Python installed and running, and you've built a small but interesting Python project right here on your Windows machine!

The truth is, a large number of people have put in innumerable hours making Python drive smooth like a Cadillac on Windows, so if you find yourself using and enjoying it, the next time someone tells you to abandon all hope and install Linux/WSL, be sure to point them at this article! Maybe if we change some minds we can help bring more Pythonistas into the incredibly awesome Python community!

Please feel free to leave comments with any questions, or hit me up on Mastodon or Twitter.

I'd love to hear from you!